Starting a worm bin is an exciting and eco-friendly way to turn food scraps into nutrient-rich compost for your garden. Whether you’re a beginner or looking for a refresher, this step-by-step guide will help you set up your first worm bin successfully.
Why Start a Worm Bin?
A worm bin is a simple way to:
- Reduce household waste.
- Produce organic compost for plants.
- Contribute to environmental sustainability.
By following these steps, you’ll have a thriving worm bin in no time.
Step 1: Choose the Right Bin
Your worm bin will be the home for your worms, so it’s essential to select one that meets their needs.
Features to Consider:
- Size: A small household can start with a bin about 10-20 gallons.
- Material: Plastic and wood are popular choices.
- Ventilation and Drainage: Ensure the bin has holes for airflow and excess liquid drainage.
DIY Bin Option:
- Take a plastic storage container with a tight-fitting lid.
- Drill small holes on the sides and lid for ventilation.
- Add holes at the bottom and a collection tray underneath to capture worm tea.
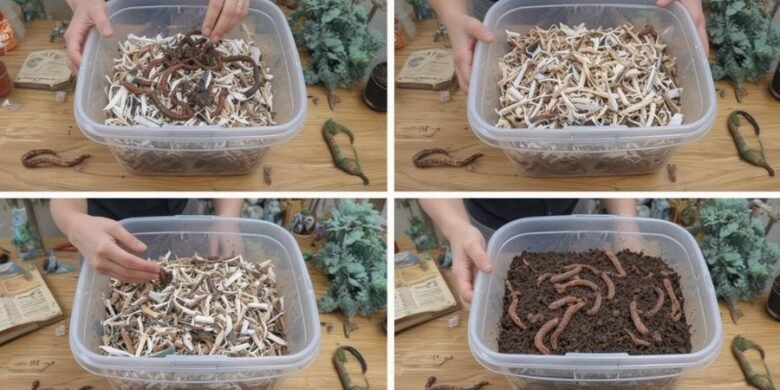
Step 2: Prepare the Bedding
Bedding mimics the worms’ natural habitat and provides a comfortable environment.
Materials Needed:
- Shredded newspaper or cardboard.
- Coconut coir or peat moss.
- A handful of garden soil for microbes.
Instructions:
- Moisten the bedding materials until they feel like a wrung-out sponge.
- Fill the bin about one-third full with the damp bedding.
- Fluff the bedding to create air pockets.
Step 3: Select the Right Worms
Not all worms are suitable for composting. The best options are:
- Red Wigglers (Eisenia fetida): Ideal for indoor bins and small setups.
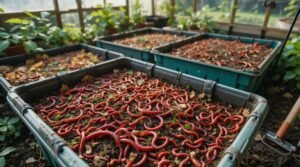
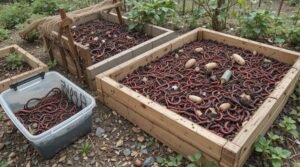
- European Nightcrawlers (Eisenia hortensis): Larger and good for outdoor bins.
Start with about 1 pound of worms (roughly 1,000 worms) for every square foot of surface area in your bin.
Step 4: Add Worms to the Bin
Gently place your worms on top of the bedding. They will burrow down to escape the light. Allow them a few hours to settle in before feeding them.
Step 5: Start Feeding Your Worms
Feed your worms a balanced diet of organic waste. Here’s how to do it:
What to Feed:
- Fruit and vegetable scraps.
- Coffee grounds and filters.
- Crushed eggshells.
What to Avoid:
- Meat, dairy, and oily foods.
- Citrus peels in large amounts.
- Processed or salty foods.
Feeding Tips:
- Chop food scraps into small pieces for faster composting.
- Bury the scraps under the bedding to prevent odors and pests.
- Start with small amounts and increase as the worms adapt.
Step 6: Maintain the Bin
A healthy worm bin requires regular maintenance. Focus on these key factors:
Moisture:
- Bedding should stay damp but not soggy.
- Add water if it feels dry, or dry bedding if it’s too wet.
Temperature:
- Keep the bin between 55-77°F (13-25°C).
- Avoid placing the bin in direct sunlight or freezing areas.
Ventilation:
- Ensure the ventilation holes are unobstructed.
- Fluff the bedding occasionally to promote airflow.
Monitor the Worms:
- Healthy worms are active and feed regularly.
- If they’re escaping or inactive, check for issues like moisture, food quality, or temperature.
Step 7: Harvest Compost
After 2-3 months, your worms will produce rich compost known as worm castings.
How to Harvest:
- Push the contents of the bin to one side.
- Add fresh bedding and food to the empty side.
- Wait a few weeks for the worms to migrate to the new section.
- Collect the compost from the vacated side.
Tips for Success
- Start Small: Don’t overfeed your worms initially.
- Observe and Adjust: Monitor the bin weekly and make adjustments as needed.
- Expand Gradually: As your worms reproduce, you can scale up your operation.
FAQs
How often should I feed my worms?
Feed them every few days, depending on how quickly they process the scraps.
Can I use garden soil in place of bedding?
No, garden soil is too heavy and can suffocate the worms. Use light, fluffy bedding materials.
What should I do if my bin smells?
A smelly bin usually means it’s too wet or overfed. Add dry bedding and reduce the amount of food.
Conclusion
Setting up your first worm bin is a straightforward process that can yield great benefits for both your household and the environment. By following these steps and maintaining optimal conditions, you’ll soon have a thriving worm bin producing high-quality compost. Happy worm farming!